写在前面
最近想捡起来之前曾经浅尝辄止的一个C++图形库FLTK, 一些简单的项目做起来还是很趁手的, 但是到了OpenGL这里就显得有点复杂了, 由于对cmake并不是很熟悉, 遇到奇奇怪怪的连接找不到的问题只能请教Stack Overflow以及官方文档1, 终于得到了解决\^_\^.
配置方法
一开始还天真的以为需要安装额外的glew, glfw等brew中的库, 后来发现系统中自带了OpenGL, 直接调用就行. 至于fltk,直接一行命令完事.
brew install fltk
目前最新版本为1.3.8.
下面是调用OpenGL的方法, 在cmakelists里面写入:
CMAKE_MINIMUM_REQUIRED(VERSION 3.1)

PROJECT(test)

FIND_PACKAGE(FLTK REQUIRED)
FIND_PACKAGE(OpenGL REQUIRED)

include_directories("/opt/homebrew/include")
link_directories("/opt/homebrew/lib")

link_libraries("fltk")
link_libraries("Xext")
link_libraries("X11")
link_libraries("m")

# 添加可执行程序
ADD_EXECUTABLE(test src/main.cpp
        			src/MyWindow.cpp
     			    src/MyWindow.h)

TARGET_LINK_LIBRARIES(test ${FLTK_LIBRARIES})
TARGET_LINK_LIBRARIES(test ${OPENGL_LIBRARIES})
下面是测试程序,参考了cs447/547计算机图形学的课程代码2,源码文件结构如下:
├── CMakeLists.txt
└── src
    ├── MyWindow.cpp
    ├── MyWindow.h
    └── main.cpp
main.cpp:
#include <Fl/Fl.H>
#include "MyWindow.h"

int main(int argc, char** args)
{
   MyWindow myWindow(400, 400, "CS447 Tutorial");
   myWindow.show();

   Fl::run();

   return 0;
}
MyWindow.h:
#ifndef MY_WINDOW_H
#define MY_WINDOW_H

#include <Fl/Fl_Gl_Window.h>

class MyWindow : public Fl_Gl_Window
{
   public:
      MyWindow(int width, int height, const char* title);
      virtual ~MyWindow();
	  void InitializeGL();
	  virtual void draw();
	  void DrawCube();
};

#endif
MyWindow.cpp:
#include <Fl/Gl.h>
#include <Fl/Glu.h> // 这里原文件采用的是`Gl/Glu.h`, 在MacOS中不能编译通过
#include "MyWindow.h"


MyWindow::MyWindow(int width, int height, const char* title) : Fl_Gl_Window(width, height, title)
{
   mode(FL_RGB | FL_ALPHA | FL_DEPTH | FL_DOUBLE);
}


MyWindow::~MyWindow()
{}


void MyWindow::InitializeGL()
{
   glClearColor(.1f, .1f, .1f, 1);
   glEnable(GL_DEPTH_TEST);
}


void MyWindow::draw()
{
   static bool firstTime = true;
   if (firstTime)
   {
      InitializeGL();
      firstTime = false;
   }// if

   glClear(GL_COLOR_BUFFER_BIT | GL_DEPTH_BUFFER_BIT);      // clear the color and depth buffer

   // view transformations
   glMatrixMode(GL_PROJECTION);
   glLoadIdentity();
   glFrustum(-1, 1, -1, 1, 1, 100);
   glMatrixMode(GL_MODELVIEW);
   glLoadIdentity();
   gluLookAt(0, 0, 3, 0, 0, 0, 0, 1, 0);

   // draw something
   DrawCube();
}


void MyWindow::DrawCube()
{
   glBegin(GL_QUADS);
      // front
      glColor3f(1, 0, 0);
      glVertex3f(-1, 1, 1);
      glVertex3f(-1, -1, 1);
      glVertex3f(1, -1, 1);
      glVertex3f(1, 1, 1);

      // back
      glColor3f(0, 1, 0);
      glVertex3f(-1, 1, -1);
      glVertex3f(1, 1, -1);
      glVertex3f(1, -1, -1);
      glVertex3f(-1, -1, -1);

      // top
      glColor3f(0, 0, 1);
      glVertex3f(-1, 1, -1);
      glVertex3f(-1, 1, 1);
      glVertex3f(1, 1, 1);
      glVertex3f(1, 1, -1);

      // bottom
      glColor3f(1, 1, 0);
      glVertex3f(-1, -1, -1);
      glVertex3f(1, -1, -1);
      glVertex3f(1, -1, 1);
      glVertex3f(-1, -1, 1);

      // left
      glColor3f(0, 1, 1);
      glVertex3f(-1, 1, -1);
      glVertex3f(-1, -1, -1);
      glVertex3f(-1, -1, 1);
      glVertex3f(-1, 1, 1);

      // right
      glColor3f(1, 0, 1);
      glVertex3f(1, 1, 1);
      glVertex3f(1, -1, 1);
      glVertex3f(1, -1, -1);
      glVertex3f(1, 1, -1);
   glEnd();
}
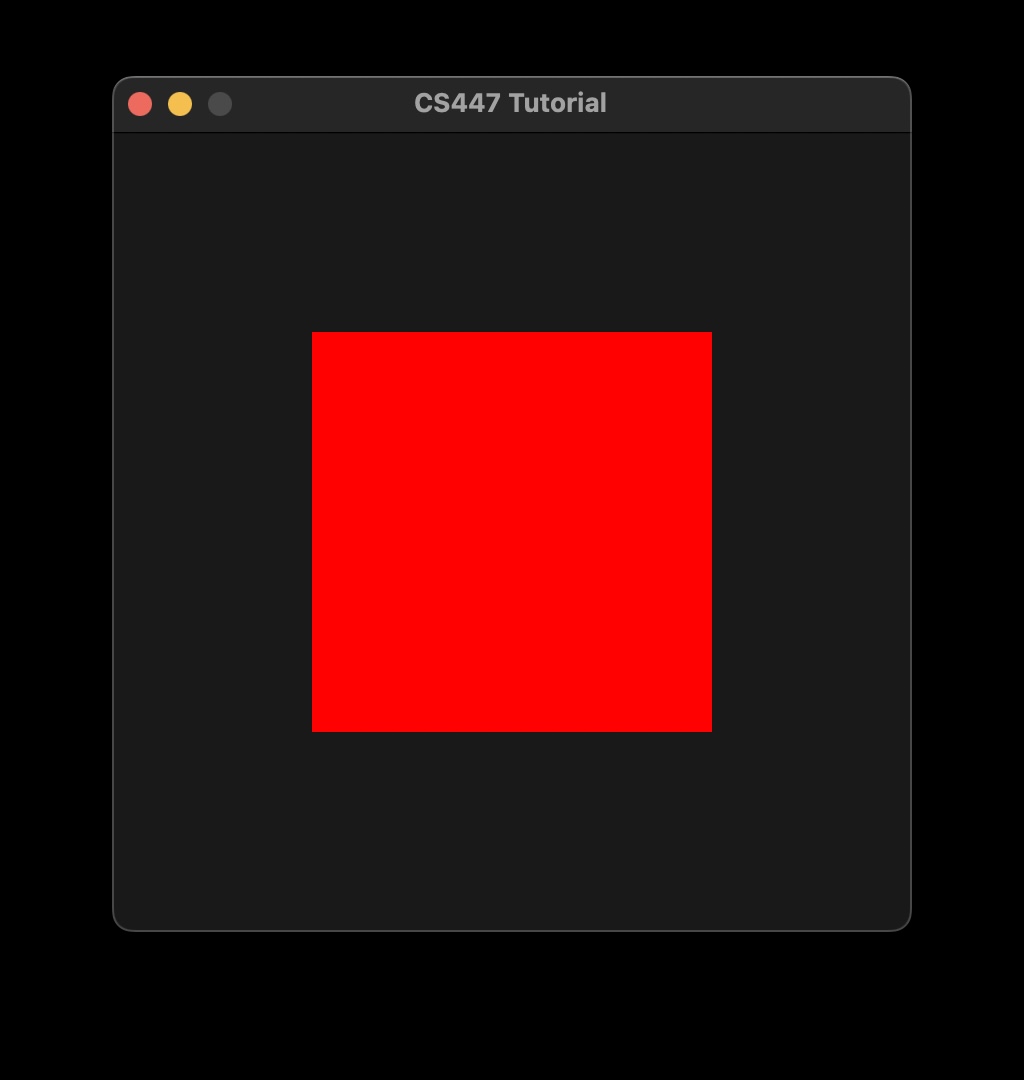
最后运行, 可以得到下面的图形, 还是不错的.